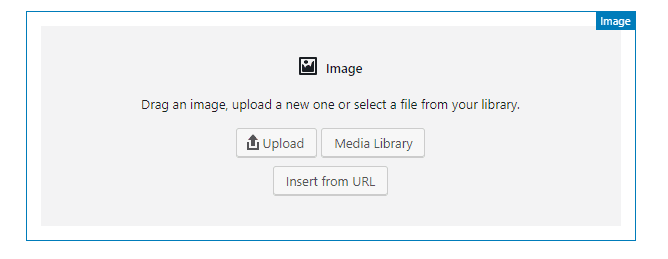
Choose the image block from the “+” icon on the left sidebar. Choose a photo or image you’d like to insert, and save the photo or image as a file on your computer. Do not use a copyrighted photo or document from another source. Just because you find something on the Internet doesn’t mean it’s free to use. Use of copyrighted materials, including photos or text, can land you in trouble and can be a costly mistake. Just don’t do it!
FOUR WAYS TO ADD AN IMAGE
- Paste or type the URL of the image. The photo will appear on the Page or Post.
- Drag and drop it onto the page. The photo will appear on the Page or Post.
- Click the Upload button, navigate to the folder where the image is stored and click Open. The photo will appear on the Page or Post.
- Click the Media Library button and click on the image you want to add. Click Select. The photo will appear on the Page or Post.
TO FORMAT IMAGES
Once an image is inserted on the page, formatting options appear above the image block. You can change alignment, link to a url, or replace the image. For more editing features like writing a caption, image title, and adding alt text, please see the Add Alt-Text section.
At the right sidebar, you can change the size of the photo or link the photo. You can change the size of the photo by grabbing a blue circle on its edge and dragging in or out.
The advanced options for the Image Block are alignment controls plus “wide width” and “full width.”
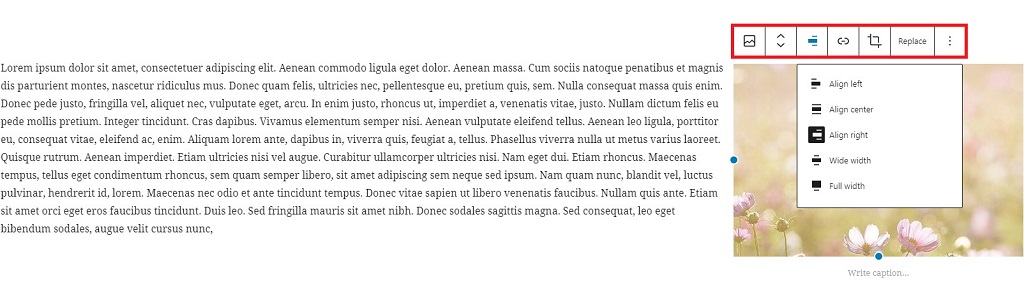
TO MOVE AN IMAGE
Click on the image you want to move, and click on the Align Center icon above the photo. The image will move to the center of the Page or Post, and Move Up and Move Down arrows will appear to the left of the image. Click the Up or Down Arrow until the image is placed where you want it to be.
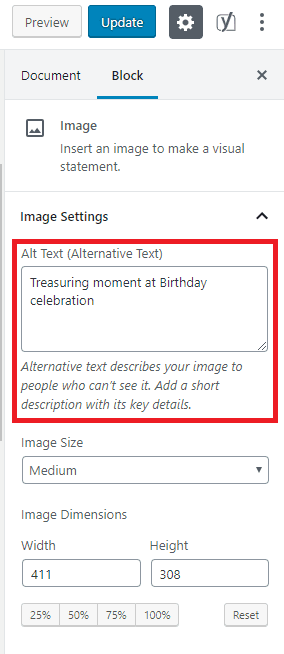
TO ADD ALT TEXT
Alt Text is important because it informs search engines what the image is and assists any sight-impaired Internet users who visit your website. Access the Alt Text box on the right sidebar. As an alternative, you can add Alt Text on the Image Details page. To access Image Details, click on your photo and click the Edit Pencil icon above the photo. Type your keyword or phrase into the Alternative Text box and Save.